Nest.jsでREST APIを作成する
はじめに
この記事では、Nest.js, PostgreSQL, Prisma, Docker を使用して REST API を作成する方法を説明します。 Nest.js は、TypeScript で書かれた Node.js のフレームワークです。 また特徴として、Express や Fastify などの Web フレームワークの上に構築され Angular から影響を受けたモジュラーな構造を持つため、大規模なプロジェクトでも一貫性と整理を維持するのが容易です。
Node.js でバックエンド開発を進めるケースとの比較で、Nest.js は以下のようなメリットがあります。
- 組み込みの依存性注入
- モジュール性
- テスト可能
- プロダクションレディ
環境構築
執筆時点のそれぞれのツールのバージョンは以下の通りです。
| ツール | バージョン |
|---|---|
| Node.js | 18.13.0 |
| Docker Compose | 2.15.1 |
| Nest.js | 9.5.0 |
Nest.js プロジェクトの作成
以下のコマンドで Nest.js プロジェクトを作成します。 また今回は例としてレシピアプリを作成することにします。
$ nest new recipe-app

$ cd recipe-app
Docker Compose の設定
Docker Compose を使用して PostgreSQL を起動します。
まずは、プロジェクトルートにdocker-compose.ymlを作成します。
version: '3.8'
services:
  db:
    image: postgres:13.4
    restart: always
    environment:
      POSTGRES_USER: root
      POSTGRES_PASSWORD: secret
      POSTGRES_DB: recipe-app
    ports:
      - 5432:5432
    volumes:
      - ./data:/var/lib/postgresql/data
次に、以下のコマンドで PostgreSQL を起動します。
$ docker-compose up -dリセットする場合は以下のコマンドを実行します。
$ docker compose rm -s -f -vprisma の導入
Nest.js で Prisma を使用するために、以下のコマンドで Prisma をインストールします。
$ yarn add -D @prisma/client

$ yarn add @prisma/cli次に、prismaを初期化します。
$ npx prisma init.env ファイルも生成されるので、以下のように設定します。
DATABASE_URL="postgresql://root:secret@localhost:5432/recipe-app?schema=public"モデル定義をするために、schema.prismaを以下のように編集します。
datasource db {
  provider = "postgresql"
  url      = env("DATABASE_URL")
}

generator client {
  provider = "prisma-client-js"
}

// 以下を追加

model User{
  id        Int      @id @default(autoincrement())
  name      String
  email     String   @unique
  hashedPassword  String
  createdAt DateTime @default(now())
  updatedAt DateTime @updatedAt
  recipes   Recipe[]
}

model Recipe{
  id        Int      @id @default(autoincrement())
  title     String
  description String
  createdAt DateTime @default(now())
  updatedAt DateTime @updatedAt
  userId    Int
  user      User     @relation(fields: [userId], references: [id], onDelete: Cascade)
}
次に、以下のコマンドでマイグレーションを実行します。
$ npx prisma migrate dev --name v0初期データを投入
seed.tsを作成して、初期データとしてユーザーを 2 人作成します。
import { PrismaClient } from '@prisma/client';

const prisma = new PrismaClient();

async function main() {
  const user1 = await prisma.user.create({
    data: {
      name: 'user1',
      email: 'user1@example.com',
      hashedPassword: 'hashedpassword1',
      recipes: {
        create: [
          {
            title: 'Recipe 1',
            description: 'Description 1',
          },
          {
            title: 'Recipe 2',
            description: 'Description 2',
          },
        ],
      },
    },
  });

  const user2 = await prisma.user.create({
    data: {
      name: 'user2',
      email: 'user2@example.com',
      hashedPassword: 'hashedpassword2',
      recipes: {
        create: [
          {
            title: 'Recipe 3',
            description: 'Description 3',
          },
        ],
      },
    },
  });

  console.log({ user1, user2 });
}

main()
  .catch((e) => {
    console.error(e);
    process.exit(1);
  })
  .finally(async () => {
    await prisma.$disconnect();
  });
次に、以下のコマンドで初期データを投入します。
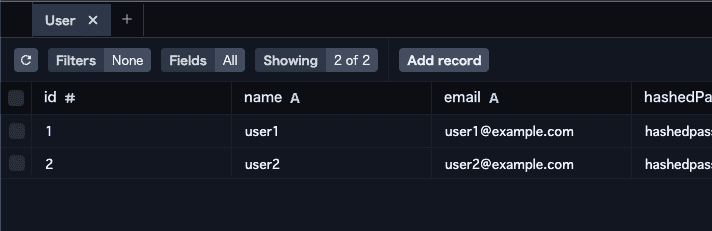
$ npx prisma db seedまたデータが投入されているか確認するために、以下のコマンドでデータを確認します。
$ npx prisma studiolocalhost:5555 にアクセスすると、以下のようにデータが投入されていることが確認できます。
API の作成
さて本題の API を作成していきます。 その前に、prisma を各ファイルで使用できるように、prisma に関する service や module を作成します。
$ nest g service prisma

$ nest g module prismaprisma.service.tsを以下のように編集します。
import { Injectable } from '@nestjs/common';
import { ConfigService } from '@nestjs/config';
import { PrismaClient } from '@prisma/client';

@Injectable()
// PrismaClient を継承することで、PrismaService で一覧取得や作成などの
// PrismaClient のメソッドを使用できるようになる
export class PrismaService extends PrismaClient {
  constructor(private readonly config: ConfigService) {
    super({
      datasources: {
        db: {
          // .env に設定した DATABASE_URL を使用する
          url: config.get('DATABASE_URL'),
        },
      },
    });
  }
}次に、prisma.module.tsを以下のように編集します。
import { Module } from '@nestjs/common';

import { PrismaService } from './prisma.service';

@Module({
  providers: [PrismaService],
  // 他のモジュールで PrismaService を使用できるようにする
  exports: [PrismaService],
})
export class PrismaModule {}また、app.module.tsに以下のように PrismaService を登録します。
import { Module } from '@nestjs/common';
import { ConfigModule } from '@nestjs/config';

import { AppController } from './app.controller';
import { AppService } from './app.service';
import { PrismaModule } from './prisma/prisma.module';
import { PrismaService } from './prisma/prisma.service';

@Module({
  // isGlobal: true にすることで、他のモジュールでも ConfigService を使用できるようになる
  imports: [ConfigModule.forRoot({ isGlobal: true }), UserModule, RecipeModule, PrismaModule],
  controllers: [AppController],
  providers: [AppService, PrismaService],
})
export class AppModule {}
あとは各々のモジュールで PrismaService を使用できるようにします。
例えば、user.module.tsを以下のように編集します。
import { Module } from '@nestjs/common';
import { PrismaModule } from 'src/prisma/prisma.module';

import { UserController } from './user.controller';
import { UserService } from './user.service';

@Module({
  imports: [PrismaModule],
  controllers: [UserController],
  providers: [UserService],
})
export class UserModule {}
レシピの一覧取得
まずはレシピの一覧を取得する API を作成します。 以下のコマンドでレシピに関する module と service と controller を作成します。
$ nest g module recipe

$ nest g service recipe

$ nest g controller recipe
service はユーザーの service と同じように、以下のように編集します。
import { Module } from '@nestjs/common';
import { PrismaModule } from 'src/prisma/prisma.module';

import { RecipeController } from './recipe.controller';
import { RecipeService } from './recipe.service';

@Module({
  controllers: [RecipeController],
  providers: [RecipeService],
  imports: [PrismaModule],
})
export class RecipeModule {}
service は PrismaClient のメソッドを使用して、データの一覧取得や該当するデータの取得の処理を行います。
import { Injectable } from '@nestjs/common';
import { PrismaService } from 'src/prisma/prisma.service';

@Injectable()
export class RecipeService {
  constructor(private prisma: PrismaService) {}

  findAll() {
    return this.prisma.recipe.findMany();
  }

  findOne(id: number) {
    return this.prisma.recipe.findUnique({
      where: { id },
    });
  }
}
最後に controller では service で作成したメソッドを使用して、API を作成します。
import { Controller, Get, Param } from '@nestjs/common';

import { RecipeService } from './recipe.service';

@Controller('recipe')
export class RecipeController {
  constructor(private readonly recipeService: RecipeService) {}

  @Get() findAll() {
    return this.recipeService.findAll();
  }

  @Get(':id') findOne(@Param('id') id: string) {
    return this.recipeService.findOne(+id);
  }
}
実際に API を叩いてみます。 そのために VSCode の拡張機能である Thunder Client を使用します。
以下のように API を叩くと、レシピの一覧が取得できることが確認できます。

id を指定して API を叩くと、該当するレシピのデータが取得できることが確認できます。

レシピの作成
次にレシピの作成を行う API を作成します。
recipe.service.tsに以下のようにメソッドを追加します。
@Injectable()
export class RecipeService {
  constructor(private prisma: PrismaService) {}

  // 省略

  create(createRecipeDto: CreateRecipeDto) {
    return this.prisma.recipe.create({
      data: {
        ...createRecipeDto,
        user: {
          // 既存の userId が`1`のユーザーを紐付けるために、`connect`を使用する
          connect: { id: 1 },
        },
      },
    });
  }
}次にrecipe.controller.tsに以下のようにメソッドを追加します。
@Controller('recipe')
export class RecipeController {
  constructor(private readonly recipeService: RecipeService) {}

  // 省略

  @Post()
  createTask(@Body() dto: CreateRecipeDto): Promise<Recipe> {
    return this.recipeService.create(dto);
  }
}
実際に API を叩いてみます。以下のように API を叩きます。
また、Prisma Studio でデータを確認すると、レシピが作成されていることが確認できます。

レシピの更新 & 削除
更新や削除の処理はレシピの作成と同じような処理になるため、さくっと実装しこの記事を終わりにします。
recipe.service.tsに以下のようにメソッドを追加します。
@Injectable()
export class RecipeService {
  constructor(private prisma: PrismaService) {}

  // 省略

  update(id: number, updateRecipeDto: CreateRecipeDto) {
    return this.prisma.recipe.update({
      where: { id },
      data: updateRecipeDto,
    });
  }

  delete(id: number) {
    return this.prisma.recipe.delete({
      where: { id },
    });
  }
}recipe.controller.tsに以下のようにメソッドを追加します。
@Controller('recipe')
export class RecipeController {
  constructor(private readonly recipeService: RecipeService) {}

  // 省略

  @Patch(':id')
  updateTask(@Param('id') id: string, @Body() dto: CreateRecipeDto) {
    return this.recipeService.update(+id, dto);
  }

  @Delete(':id') deleteTask(@Param('id') id: string) {
    return this.recipeService.delete(+id);
  }
}
まとめ
NestJS で REST API を作成する方法を紹介しました。 NestJS は TypeScript で書かれているため、TypeScript で API を作成したい方にはおすすめのフレームワークです。
ここでは基本的な CRUD の API を作成しましたが、JWT 認証やテストの自動化など、NestJS でできることはまだまだあります。 その辺りも今後記事にしていきたいと思います。